Software Misc
Cover image by AltumCode
- Security
- Gitea and DroneCI
- Caddy Handler
- FOSS Funding
- Golang Web Services and Gin
- CRON No MTA installed discarding output
- Low and No Code Frontends
- RSync
- Story Mapping
- Logseq HTTP API
- Data Lakehouse
- Design Frameworks
- ZSH and Unraid
- Node Python and Corporate Firewalls (ZScaler)
- BookStack CLI
- Building tea CLI for Termux
- Linking GitHub Repos to an ADO GitHub Connector (gh artado)
Security
- The OWASP API Top 10 security measures may be a good place to start when trying to decide what security to implement on your web project
Gitea and DroneCI
I use Gitea to self-host my code + projects here and I use DroneCI, a lightweight CI pipeline that integrates into gitea to do automation stuff.
Configuration of Drone + Gitea
TODO: write about setup here - docker etc
Drone CI Config
Drone works like many other CI systems - use yaml files in the repository to control builds. You can specify the type of CI run at the top level of the yaml doc and also give it a name:
kind: pipeline
type: docker
name: test and build
You can define multiple build steps - each one can have its own docker image - this is useful for example if you have a React frontend and a Golang backend and you need to build both
steps:
   - name: test_backend
     image: python:3.7
     commands:
      - pip install poetry
      - poetry install
      - poetry run pytest

   - name: test_frontend
     image: node
     commands:
      - npm install
      - npm test
Shared State Between Steps
Conditional Execution of Steps
You can opt to only run steps under certain conditions. For example you might only want to publish code when stuff gets pushed to master. Use conditions to do this:
   - name: publish
     when:
       branch:
        - master
       event:
        exclude:
        - pull_request
     image: python3.7
     commands:
      - twine upload...
The drone documentation has a full set of conditions that you can use - you can also whitelist and blacklist certain events and certain branches
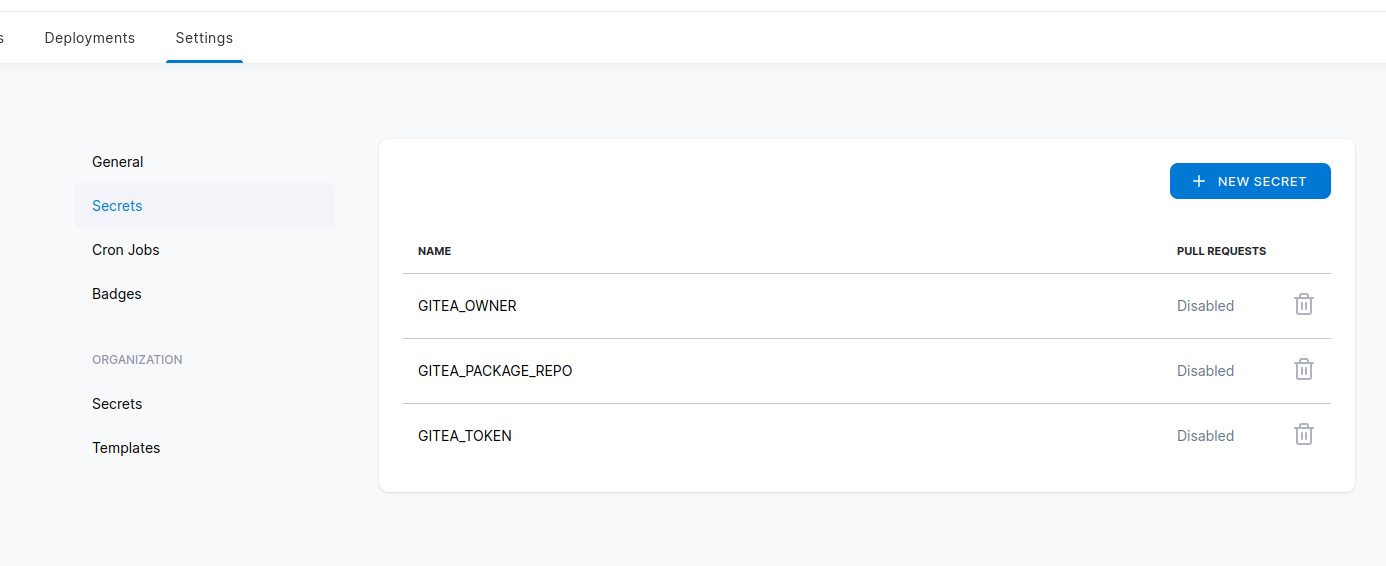
Secrets
Secrets can be used to pass things like auth tokens into CI pipelines. This is useful if you want to do things like publish packages or upload files. You essentially declare an environment variable and then define which "secret" it came from in your CI yaml file:
 - name: publish
     when:
       branch:
        - master
       event:
        exclude:
        - pull_request
     image: python3.7
     environment:
      GITEA_PACKAGE_REPO:
        from_secret: gitea_package_repo
      GITEA_OWNER:
        from_secret: gitea_owner
      GITEA_TOKEN:
        from_secret: gitea_token
Then in the drone frontend you can add the value and it will be stored securely and passed to the CI at run time:
Backup Mechanism
Caddy Handler
You can set up caddy to do different things depending on the prefix using handle directive
testsite.com {
  handle_path /media* {
    root * /path/to/media
    file_server
  }

  handle {
    root * /path/to/normal/content
    file_server
  }
}
FOSS Funding
Underfunding of FOSS projects can be disasterous as this list shows.
Golang Web Services and Gin
I've been using GoLang to build IndieScrobble
Live Reload
I use this package to live-reload my application as I make changes to it.
CRON No MTA installed discarding output
Answer from here
Linux uses mail for sending notifications to the user. Most Linux distributions have a mail service including an MTA (Mail Transfer Agent) installed. Ubuntu doesn't though.
You can install a mail service, postfix for example, to solve this problem.
sudo apt-get install postfixOr you can ignore it. I don't think the inability of cron to send messages has anything to do with the CPU spike (that's linked to the underlying job that cron is running). It might be safest to install an MTA and then read through the messages (
muttis a good system mail reader).
0 3 * * * <em>cmd</em> >> <em>/some/log/file</em> 2>&1
Low and No Code Frontends
Quite often it is useful to have ugly-but-functional frontends for accessing things like databases and carrying out user management. Recently commercial tools like Retool have made it really easy to build this kind of thing by providing drag-and-drop UI builders that are reminiscent of the Visual Studio tooling that we had in the late 90s and early 00s.
Appsmith
Appsmith is a FOSS low-code app builder. IT can connect with a variety of data sources and apps can be exported to git
RSync
RSync is a FOSS file copying/syncing tool that has a number of uses and can be used to sync via SSH.
Preserving User Permission in Rync
https://brainsteam.co.uk/2024/01/03/migrating-users-across-servers-with-rsync/
Syncing with Non-Standard SSH Ports
It's generally good practice to run SSH services on non-standard ports so that they can't be (as) easily port-scanned and attacked. If you need to use RSync with a non standard port you can tell it any extra ssh arguments it needs to know about via the -e argument as explained in this article (mirror):
rsync -arvz \
  -e 'ssh -p <port-number>' \
  --progress --delete \
  user@remote-server:/path/to/remote/folder /path/to/local/folder
Story Mapping
Resources
https://www.easyagile.com/blog/the-ultimate-guide-to-user-story-maps/#what-is-user-story-mapping
Logseq HTTP API
LogSeq provides a HTTP API for developing plugins. The documentation is not particularly intuitive to get used to.
Enabling the API
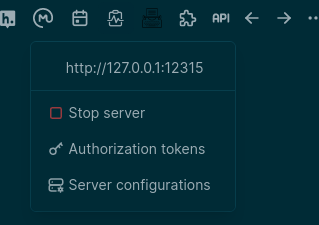
1. Turn on Dev Mode + API
You need to turn on developer mode within Logseq via the settings menu:
Go into the advance settings and enable developer mode

Then when the app restarts you should be able to enable the API
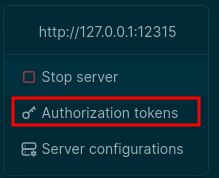
2. Add a Token
by default no token is provided so you won't be able to call the api. Open the manage tokens dialog and create a new token:
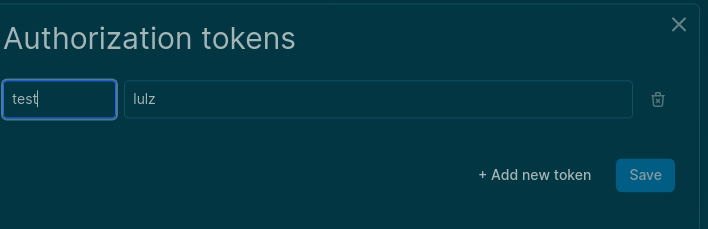
You will now be able to make HTTP requests to the given URL and PORT using Authorization: Bearer lulz or whatever value you chose.
Using the API
If you open your browser and head to http://127.0.0.1:12315/ you will be advised that you can POST to http://127.0.0.1:12315/api with a JSON payload and you can specify which method to call and what arguments to pass. You can use the Logseq Plugin Docs to find a list of methods that can be used.
For example if I have a page called Logseq I could use the following payload along with an Authorization: Bearer <token> header to get the page's markdown block content:
{
  "method":"logseq.Editor.getPageBlocksTree",
  "args":[
    "Logseq"
  ]
}
You can pretty much use any of the methods listed on the plugin doc page with this method - you'll need to check the required arguments in the documentation and make sure that you pass the correct args.
Data Lakehouse
A data lake house combines together the best bits of data warehouses and data lakes.
Data Lakehouses could be seen as the natural convergence of the two architectures (see https://cloud.google.com/blog/products/data-analytics/data-lake-and-data-warehouse-convergence)
Data Lake
Data Lake is the name we give to a collection of tools that are often used together to process large amounts of data. Typically it includes a storage system like S3 or HDFS and a processing system like Apache Spark or Hadoop.
- Store lots of data - often in its raw "unprocessed" form in pseudo-real-time
- Process a subset of data in real-time or in batch modes
- Provide language-agnostic language runtimes for data analysis.
Data Warehouse
A data warehouse is usually where data that has been processed and is now structured is stored. It is often used directly by business analysts in downstream applications. Data warehouses don't scale easily and typically have a lot more validation and processing associated with them.
Data Lakehouse
A data lakehouse attempts to combine elements of both Data Lake and Data Warehouse - again it is typically the name given to a group of systems architected together to provide this set of functionality. It normally supports Extract, Load and Transform paradigm.
References
- https://cloud.google.com/learn/what-is-a-data-lake
- https://www.snowflake.com/guides/what-data-lakehouse
- https://azure.microsoft.com/en-us/resources/cloud-computing-dictionary/what-is-a-data-lake
Design Frameworks
Design frameworks provide out of the box styling and components for use in websites. Many frameworks sit on top of Javascript and Typescript libraries and some lightweight frameworks simply provide CSS styles on top of static HTML.
React Frameworks
Lightweight CSS Frameworks
- SimpleCSS - written by Kev Quirk and provides a very simple and lightweight framework on top of standard HTML5 elements and components.
- Foundation - another lightweight CSS framework that works without loads of javascript libraries.
ZSH and Unraid
This set of instructions is 95% based on this reddit thread (see below for an archived version if the link doesn't work)
- Install un-get plugin (using plugin manager, copy and paste the raw link to the .plg from github)
- Install zsh:
un-get update && un-get install zsh - Install User Scripts plugin (in Community Applications)
- edit
/boot/config/goand add the following to the file:
# Install Oh-My-Zsh HOME="/root" sh -c "$(wget https://raw.githubusercontent.com/robbyrussell/oh-my-zsh/master/tools/install.sh -O -)" - Create your .zshrc file at
/boot/config/extra/.zshrc:
export ZSH="/root/.oh-my-zsh" ZSH_THEME="robbyrussell" DISABLE_UPDATE_PROMPT="true" HISTSIZE=10000 SAVEHIST=10000 HISTFILE=/root/.cache/zsh/history plugins=( zsh-autosuggestions zsh-syntax-highlighting ) source $ZSH/oh-my-zsh.sh # User configurations alias l='ls -lFh' #size,show type,human readable alias la='ls -lAFh' #long list,show almost all,show type,human readable - Create a new script named "zsh" in user scripts and set it to "At Startup of Array"
- Edit the script you just created
/boot/config/plugins/user.scripts/scripts/zsh/script
#!/bin/bash HOME=/root OH_MY_ZSH_ROOT="$HOME/.oh-my-zsh" ZSH_CUSTOM="$HOME/.oh-my-zsh/custom" OH_MY_ZSH_PLUGINS="$ZSH_CUSTOM/plugins" OH_MY_ZSH_THEMES="$ZSH_CUSTOM/themes" mkdir -p $OH_MY_ZSH_PLUGINS mkdir -p $OH_MY_ZSH_THEMES # Install zsh-autosuggestions if [ ! -d "$OH_MY_ZSH_PLUGINS/zsh-autosuggestions" ]; then echo " -> Installing zsh-autosuggestions..." git clone https://github.com/zsh-users/zsh-autosuggestions $OH_MY_ZSH_PLUGINS/zsh-autosuggestions else echo " -> zsh-autosuggestions already installed" fi # Install zsh-syntax-highlighting if [ ! -d "$OH_MY_ZSH_PLUGINS/zsh-syntax-highlighting" ]; then echo " -> Installing zsh-syntax-highlighting..." git clone https://github.com/zsh-users/zsh-syntax-highlighting.git $OH_MY_ZSH_PLUGINS/zsh-syntax-highlighting else echo " -> zsh-syntax-highlighting already installed" fi chmod 755 $OH_MY_ZSH_PLUGINS/zsh-autosuggestions chmod 755 $OH_MY_ZSH_PLUGINS/zsh-syntax-highlighting chsh -s /bin/zsh # Remove oh-my-zsh default .zshrc rm /root/.zshrc # Make sure the necessary directories are existing mkdir -p /root/.cache/zsh/ mkdir -p /boot/config/extra/ # Make sure history file exists touch /boot/config/extra/history # Symlink .zshrc and history files cp -sf /boot/config/extra/.zshrc /root/.zshrc cp -sf /boot/config/extra/history /root/.cache/zsh/history - Reboot your server and you should now have zsh setup (or run the scripts manually and create .zshrc file in /root/)
References
Node Python and Corporate Firewalls (ZScaler)
Node Custom CA Certificate
Assuming the corporate CA certificate is already installed on your system, you can use export NODE_OPTIONS="--use-system-ca" to ensure that node applications use the corporate cert instead.
Python
Reference
BookStack CLI
Documentation for the bookstack-cli-rs tool
Generic Packages in CI/CD
Forgejo (and Gitea) provide a generic package registry that allows you to publish arbitrary files from CI/CD pipelines — ideal for distributing compiled binaries, configuration files, or any static assets.
Authentication
Forgejo requires Basic authentication for the generic packages API. This differs from the standard REST API which accepts Authorization: token headers.
curl --user "<username>:<PAT>" ...
Where <PAT> is a Personal Access Token with the write:package scope.
Publishing Files
Upload a single file
curl -X PUT \
  --user "<username>:<PAT>" \
  --upload-file ./mybinary \
  https://git.example.com/api/packages/<owner>/generic/<repo>/<version>/<filename>
Path components:
| Component | Description |
|---|---|
<owner> |
Your username or organization name |
<repo> |
Repository name (used as package namespace) |
<version> |
Version string (e.g. v1.0.0, 0.2.1-rc1) |
<filename> |
The actual file to upload |
Upload multiple files for the same version
curl -X PUT \
  --user "<username>:<PAT>" \
  --upload-file ./linux-binary \
  https://git.example.com/api/packages/<owner>/generic/<repo>/<version>/linux-binary

curl -X PUT \
  --user "<username>:<PAT>" \
  --upload-file ./macos-binary \
  https://git.example.com/api/packages/<owner>/generic/<repo>/<version>/macos-binary
Each file is stored independently under the same version path.
Downloading Files
Direct download with authentication
curl -fsSL --user "<username>:<PAT>" \
  https://git.example.com/api/packages/<owner>/generic/<repo>/<version>/<filename> \
  --output ./downloaded-binary
The -fsSL flags:
-f: Fail silently on HTTP errors-s: Silent mode (no progress meter)-S: Show errors if silent mode is used-L: Follow redirects
Without authentication (public packages)
If the package repository is public, you can download without credentials:
curl -fsSL \
  https://git.example.com/api/packages/<owner>/generic/<repo>/<version>/<filename> \
  --output ./downloaded-binary
GitHub Actions Workflow Example
name: Release
on:
  push:
    tags:
      - "v*"

permissions:
  contents: write
  packages: write

jobs:
  release:
    runs-on: ubuntu-latest
    steps:
      - uses: actions/checkout@v4

      - name: Build release binary
        run: cargo build --release

      - name: Upload to generic registry
        env:
          GITEA_TOKEN: ${{ secrets.PACKAGE_TOKEN }}
        run: |
          curl -X PUT \
            --user "${{ github.actor }}:${GITEA_TOKEN}" \
            --upload-file target/release/myapp \
            https://git.example.com/api/packages/${{ github.repository_owner }}/generic/myapp/${{ github.ref_name }}/myapp
Gitea Actions Workflow Example
name: Release
on:
  push:
    tags:
      - "v*"

jobs:
  release:
    runs-on: ubuntu-latest
    steps:
      - uses: actions/checkout@v4

      - name: Build release binary
        run: cargo build --release

      - name: Upload to generic registry
        env:
          GITEA_TOKEN: ${{ secrets.PACKAGE_TOKEN }}
        run: |
          curl -X PUT \
            --user "username:$GITEA_TOKEN" \
            --upload-file target/release/myapp \
            https://git.example.com/api/packages/${{ github.repository_owner }}/generic/myapp/${{ github.ref_name }}/myapp
Troubleshooting
| Error | Cause | Solution |
|---|---|---|
401 Unauthorized |
Missing or invalid PAT | Verify token has write:package scope |
403 Forbidden |
Insufficient permissions | Ensure user has write access to the repository |
404 Not Found |
Wrong path or private package | Check owner/repo/version/filename; use auth for private packages |
405 Method Not Allowed |
Wrong HTTP method | Use PUT, not POST |
500 Internal Server Error |
Content-Type mismatch | Remove Content-Type: application/json; let curl auto-detect |
Key Differences: Forgejo vs Gitea
Both Forgejo and Gitea support generic packages, but authentication differs:
| Endpoint | Gitea Auth | Forgejo Auth |
|---|---|---|
/api/v1/... (REST) |
Authorization: token <PAT> |
Authorization: token <PAT> |
/api/packages/... (packages) |
Authorization: token <PAT> |
Basic auth (--user user:token) |
Always use Basic auth for the packages API to ensure compatibility across both platforms.
Getting Started
Getting Started
Overview
bookstack-cli-rs is a command-line interface for the BookStack API, written in Rust. It supports profile-based authentication, all CRUD operations for books/chapters/pages/shelves, and full-text search. Container filtering lets you narrow list results by shelf (books), book (chapters), or book/chapter (pages).
Installation
From Source
cargo install --path .
Pre-built Binaries
Download from Gitea generic packages:
curl -fsSL \
  --user "<username>:$GITEA_TOKEN" \
  https://git.example.com/api/packages/<owner>/generic/bookstack-cli-rs/v0.2.0/bookstack-cli-rs-x86_64-unknown-linux-gnu \
  -o bookstack-cli-rs && chmod +x bookstack-cli-rs
Version
Current version: v0.2.0
Configuration
Profiles store your BookStack instance URL and API tokens. Config is saved to ~/.config/bookstack-cli-rs/profiles.toml.
Add a Profile (CLI)
bookstack profiles add --name mywiki \
  --url https://wiki.example.com \
  --token-id ABCDEF1234567890 \
  --token-secret 0123456789ABCDEF
Add a Profile (Environment Variables)
export BOOKSTACK_URL=https://wiki.example.com
export BOOKSTACK_TOKEN_ID=ABCDEF1234567890
export BOOKSTACK_TOKEN_SECRET=0123456789ABCDEF

bookstack profiles add --name mywiki
List Profiles
bookstack profiles list
Output:
Configured profiles:
  [default] My Wiki - https://wiki.example.com (default)
  [mywiki] Another Wiki - https://wiki2.example.com
Delete a Profile
bookstack profiles delete --name mywiki
Using Profiles
Specify which profile to use with -p or --profile:
bookstack -p mywiki list-books
bookstack list-books                    # uses default profile if no -p given
Basic Usage Examples
List All Books
bookstack list-books
Filter Books by Shelf
bookstack list-books --shelf-id 1
List Chapters in a Book
bookstack list-chapters --book-id 9
List Pages in a Chapter
bookstack list-pages --chapter-id 42
Search Content
bookstack search "rust"
bookstack search "rust" --type page --count 10
Get Page with Full Content
bookstack get-page 308 --content      # show HTML content
bookstack get-page 308 --markdown     # show markdown content
Next Steps
- See the CLI Reference for all commands and options.
- Check out Generic Package Publishing Debugging for CI/CD integration notes.
CLI Reference
CLI Reference
Global Options
| Option | Description |
|---|---|
-p, --profile <NAME> |
Profile name to use (uses default if not specified) |
Profiles
Manage authentication profiles.
profiles add
Add a new profile with URL and API tokens.
bookstack profiles add --name mywiki --url https://wiki.example.com \
  --token-id <TOKEN_ID> --token-secret <TOKEN_SECRET>
| Option | Description | Environment Variable |
|---|---|---|
--name <NAME> |
Profile name | — |
--url <URL> |
BookStack instance URL | BOOKSTACK_URL |
--token-id <ID> |
API Token ID | BOOKSTACK_TOKEN_ID |
--token-secret <SECRET> |
API Token Secret | BOOKSTACK_TOKEN_SECRET |
profiles list
List all configured profiles.
bookstack profiles list
profiles delete
Delete a profile by name.
bookstack profiles delete --name mywiki
Books
list-books
List all books, optionally filtered by shelf.
bookstack list-books [--shelf-id <ID>] [--count <NUM>]
| Option | Description |
|---|---|
--shelf-id <ID> |
Filter by shelf ID |
--count <NUM> |
Max results (default: 20) |
get-book
Get details of a single book.
bookstack get-book <ID>
create-book
Create a new book.
bookstack create-book <NAME> [DESCRIPTION]
update-book
Update an existing book.
bookstack update-book <ID> [--name <NAME>] [--description <DESC>]
delete-book
Delete a book.
bookstack delete-book <ID>
Chapters
list-chapters
List all chapters, optionally filtered by book.
bookstack list-chapters [--book-id <ID>] [--count <NUM>]
| Option | Description |
|---|---|
--book-id <ID> |
Filter by book ID |
--count <NUM> |
Max results (default: 20) |
get-chapter
Get details of a single chapter.
bookstack get-chapter <ID>
create-chapter
Create a new chapter in a book.
bookstack create-chapter --book-id <ID> --name <NAME> [--description <DESC>]
update-chapter
Update an existing chapter.
bookstack update-chapter <ID> [--name <NAME>] [--description <DESC>] [--book-id <ID>]
delete-chapter
Delete a chapter.
bookstack delete-chapter <ID>
Pages
list-pages
List all pages, optionally filtered by book or chapter.
bookstack list-pages [--book-id <ID>] [--chapter-id <ID>] [--count <NUM>]
| Option | Description |
|---|---|
--book-id <ID> |
Filter by book ID |
--chapter-id <ID> |
Filter by chapter ID (includes sub-chapters) |
--count <NUM> |
Max results (default: 20) |
get-page
Get a page with optional content display.
bookstack get-page <ID> [--content|--markdown]
| Option | Description |
|---|---|
--content |
Show full HTML content |
--markdown |
Show markdown content |
create-page
Create a new page in a book or chapter.
bookstack create-page --name <NAME> \
  [--book-id <ID>] [--chapter-id <ID>] \
  [--html <HTML>] [--markdown <MD>] [--content <TEXT>]
At least one of --book-id or --chapter-id is required. At least one of --html, --markdown, or --content is required.
update-page
Update an existing page.
bookstack update-page <ID> \
  [--name <NAME>] [--html <HTML>] [--markdown <MD>] [--content <TEXT>] \
  [--book-id <ID>] [--chapter-id <ID>]
delete-page
Delete a page.
bookstack delete-page <ID>
Shelves
list-shelves
List all shelves.
bookstack list-shelves [--count <NUM>]
get-shelf
Get details of a single shelf.
bookstack get-shelf <ID>
create-shelf
Create a new shelf.
bookstack create-shelf <NAME> [DESCRIPTION]
Search
Search across all content types.
bookstack search <QUERY> [--type <TYPE>] [--count <NUM>]
| Option | Description |
|---|---|
--type <TYPE> |
Filter by type: page, chapter, book, bookshelf |
--count <NUM> |
Max results (default: 20) |
Examples
# Search all content for "rust"
bookstack search "rust"

# Search only pages
bookstack search "rust" --type page

# Search with limit
bookstack search "configuration" --count 5
Building tea CLI for Termux
Overview
This documents the process of building the tea CLI (official Gitea CLI tool) as a Termux package for aarch64 Android devices.
Prerequisites
- Docker installed with user in docker group
- termux-packages repository cloned
- Android NDK is handled automatically by the Docker builder image
Phase 1 -- Local Build
1. Clone termux-packages
git clone https://github.com/termux/termux-packages
2. Create package directory and build.sh
File: packages/tea/build.sh
Key fields:
| Field | Value |
|---|---|
| TERMUX_PKG_VERSION | 0.14.0 |
| TERMUX_PKG_SRCURL | https://gitea.com/gitea/tea/archive/refs/tags/v${TERMUX_PKG_VERSION}.tar.gz |
| TERMUX_PKG_SHA256 | f509de217ac0e57491ffdab2750516e8c505780881529ee703b9d0c86cc652a3 |
| TERMUX_PKG_LICENSE | MIT |
| TERMUX_PKG_BUILD_DEPENDS | golang |
| TERMUX_PKG_BUILD_IN_SRC | true |
Critical notes:
- Do NOT set TERMUX_PKG_DEPENDS= (empty value is parsed as a dependency on an empty string -- caused the first build failure)
- Use termux_setup_golang in termux_step_pre_configure()
- Build with CGO_ENABLED=0 for pure Go compilation
3. Build via Docker
cd termux-packages
bash scripts/run-docker.sh
# Inside container:
./build-package.sh -f -I tea
The -f flag forces rebuild, -I downloads dependencies from Termux repos instead of building them locally.
4. Result
- Output: output/tea_0.14.0_aarch64.deb (6.2MB)
- Install on device: pkg install ./output/tea_0.14.0_aarch64.deb
Phase 2 -- Contribute Upstream
Submitting to termux-packages
- Fork https://github.com/termux/termux-packages
- Add packages/tea/build.sh to your fork
- Create PR with commit message: addpkg(main/tea): add tea CLI for Gitea servers
Packaging Policy Compliance
- MIT licensed
- Active project (233+ stars on Gitea)
- Pure Go (no CGO issues, no native deps)
- Not installable via language-specific package manager
- Package size under 100MB
Known Issues Encountered
- Empty TERMUX_PKG_DEPENDS -- Setting TERMUX_PKG_DEPENDS= causes parse error: "depends on non-existing package". Fix: omit the line entirely.
- NDK not installed -- Local build fails without Android NDK. Fix: use Docker builder image instead.
- SSH sudo -- run-docker.sh requires TERMUX_DOCKER_USE_SUDO=1 unless user has sorted sudo permissions.
Build Time
Approximately 5-15 minutes for first build (downloading Go toolchain, fetching all Go module dependencies, cross-compilation). Subsequent builds are faster due to caching.
Linking GitHub Repos to an ADO GitHub Connector (gh artado)
The ADO interface for managing GitHub repo connections is cumbersome and permission issues are common. The gh artado CLI extension makes bulk additions straightforward.
Prerequisites
- GitHub CLI (
gh) installed - ADO Personal Access Token (PAT) with appropriate permissions
Install the Extension
gh extension install apdarr/gh-artado
No need to clone the repo — the extension installs directly via the GitHub CLI.
Source: https://github.com/apdarr/gh-artado
Set Environment Variables
export ADO_USERNAME="your.name@example.com"
export ADO_TOKEN="<your-ado-pat>"
export ADO_PROJECT="org-name/project-name"
PowerShell equivalent (save as .ps1):
$Env:ADO_USERNAME = 'your.name@example.com'
$Env:ADO_TOKEN    = '<your-ado-pat>'
$Env:ADO_PROJECT  = 'org-name/project-name'
Warning: The README in the GitHub repo has outdated variable names. Use the names above.
Find Your Connection ID
gh artado list
Output looks like:
CONNECTION ID                          CONNECTION NAME      CONNECTION TYPE    CONNECTED REPO(S)
xxxxxxxx-xxxx-xxxx-xxxx-xxxxxxxxxxxx  MyGitHubConnection   InstallationToken  https://github.com/org/repo-a
                                                                               https://github.com/org/repo-b
Copy the Connection ID for the connector you want to add repos to.
Add a Single Repo
gh artado add --connection <connection-id> -r https://github.com/org/repo-name
Bulk Add Repos
- Create a file (e.g.
reposToAdd.txt) with one repo URL or name per line:
https://github.com/org/repo-one
https://github.com/org/repo-two
https://github.com/org/repo-three
- Run the bulk add:
gh artado add-bulk -c <connection-id> -f reposToAdd.txt
The output confirms which repos were added. Verify in ADO under the GitHub connector settings if needed.